How to Sew a Baby Blanket With Satin Binding
With so many new babies around the office this and last year, we have become a baby blanket making factory. I have found a quick and easy way to attach satin baby blanket binding. Read on to learn how to make attaching baby blanket binding a breeze.
Photo Credit: Getty Images
Attaching satin baby blanket binding can be a chore. The slick nature of the satin blanket binding sandwiched between fussy baby blanket fabric can tax even the most advanced sewer. Here are some tips for mitering corners, joining strips and finishing a blanket in under an hour.
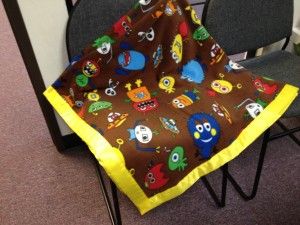
I was at the fabric store this weekend buying fleece for my little boy's costume (more on that later). I couldn't pass up this fun monster print and had to make a blanket.
I decided to keep it simple and stick to one layer of fleece and bind the whole thing with pre-made satin blanket binding. Could it get any easier than that? This way, I was sure I could actually finish the thing!
Here's how I did it:
Supplies:
- 1 1/2 yards of fleece, selvages trimmed
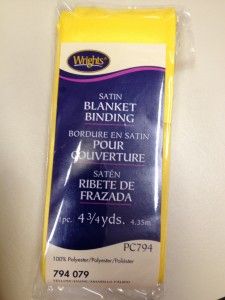
- 2 packages of pre-made satin blanket binding, pressed flat
- all-purpose thread that matches the binding (I used Coats & Clark Dual Duty XP)
- sewing machine (I used a Husqvarna Viking Designer Ruby)
Instructions
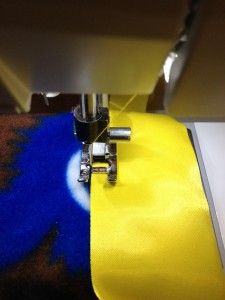
Find one end of one binding strip. (Notice that one long edge is shorter than the other. This is the edge you want to face you as you sew.)
Position the binding end along the enter of one fleece edge, sandwiching the fleece between the binding and abutting the fleece edge with the binding fold; pin. Make sure the shorter binding long edge is facing up, along with the fabric right side.
Set the machine for a 5mm-wide zigzag stitch, and make sure the machine is set for heavyweight fabric (or adjusting the presser foot pressure to accommodate the thick layers).
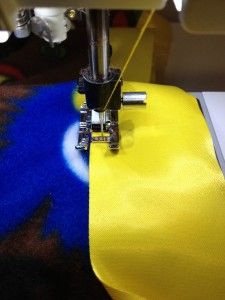
Zigzag stitch the binding to the fleece, making sure to catch both binding long edges with the stitches. Position the left needle swing just off of the binding on the left side.
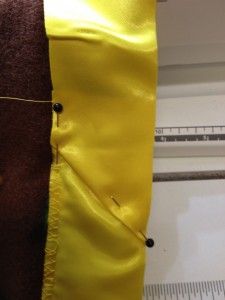
At the corner, stop sewing 3 1/2″ from the edge. Leave the needle in the fabric. Pin the fleece/binding at the corner.
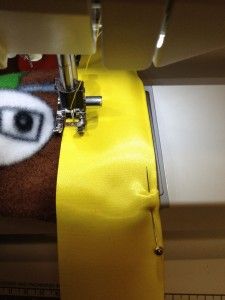
Fold the binding toward the adjacent edge, aligning the fleece edge with the binding fold; pin.
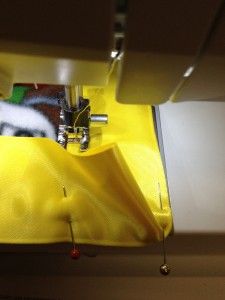
Push the excess binding into the corner, aligning the excess fold with the binding fold. Remove the first pin. Make sure the back is doing the same thing as the front. Pin the mitered corner.
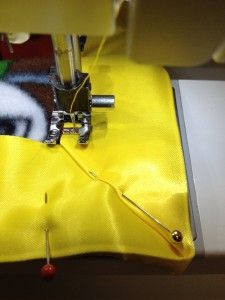
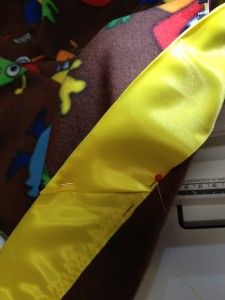
Continue sewing to the corner and around to the next edge, pivoting at the corner and leaving the pin in the miter fold.
Continue stitching the binding, mitering the corners as you reach them. Stitch all the way to the binding end. Using the second package of binding, locate the end so the narrow long edge is facing up. Unfold the end and refold the corner points into a triangle; press.
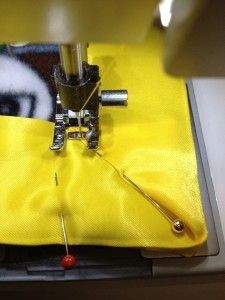
Wrap the triangle around the stitched end, aligning the binding long edges; pin.
Make sure the back looks like the front.
Continue stitching the remaining binding.
Trim the excess binding 3 1/2″ beyond the beginning.

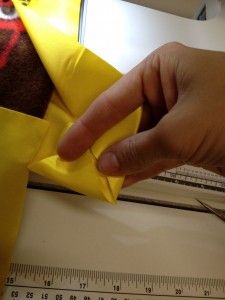
Fold the end into a triangle as per the previous instructions, pin, and then stitch to conceal the beginning raw end.
Stitch over each joining seam, backstitching at the beginning and end.
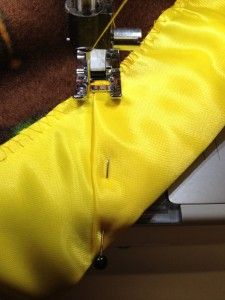

Stitch the mitered corners as per the joining seams.
Just like that you have your finished blanket!
I've tried to hand sew the joining seams and mitered folds, but the satin binding has a tendency to fray when the hand sewing needle passes through it too many times. Machine sewing is the best solution.
I love making my own binding when the project calls for it. I especially love the Binding Express with its handy little ironing pad it's perfect to make strips of binding.
If you need to stabilize tricky fabrics try using Spray N' Bond Spray Adhesive. This new can offers precision spraying so you don't waste a drop.
And, we all know sewing is pressing. Get the Perfect Pressing kit to make all your projects in perfect pressed shape.
I hope you use this tutorial and tips to make plenty of blankets using all the cute fabrics that are hitting the shelves through out the year.
Happy Sewing!
Ellen

How to Sew a Baby Blanket With Satin Binding
Source: https://www.sewdaily.com/sewing/attaching-satin-blanket-binding/
Belum ada Komentar untuk "How to Sew a Baby Blanket With Satin Binding"
Posting Komentar